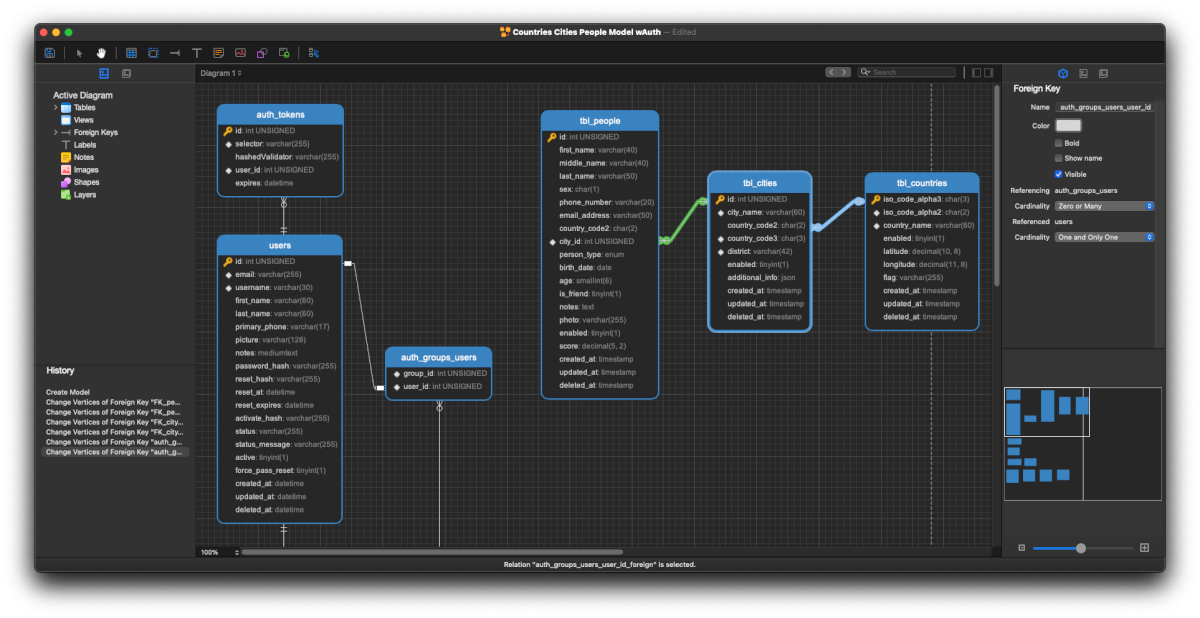
Explore Navicat 15's enhanced data modeling capabilities. Design generic models, convert to specific platforms, and streamline database creation.
published on 1 Jan 2024 in Web DevelopmentDatabasesNavicat comes with an incredibly responsive and elegant user interface design with improved usability, and it has been enabling users to get a visually appealing and semantically precise data models from their databases for almost a decade now.
Released in November 2019, Navicat 15 (and Data Modeler 3.0) has some nice surprises in store, with an even more improved data modeling capability. You can now design generic data models and then convert them for a specific database platform.
Together with an accurate field type prediction feature and unlimited undo/redo capability, it reduces design and development time, and offers a quick and efficient way to create and edit your table/view structures.
In this article, I will show you how to design a simple data model with two entities from scratch in Navicat 15, and then how to automatically create tables and fields from this model in a newly created blank MySQL database.
With a data modeling-capable Navicat 15 edition (see the list below), you can now design database-platform-agnostic logical data models, which you can, then, convert to what’s called physical models that aim a specific database platform.
You can follow along this tutorial hands-on with a trial version of the following Navicat 15 editions:
- Navicat Data Modeler 3.0 or later
- Navicat Premium 15 Enterprise Edition
- Navicat 15 for MySQL Enterprise Edition
- Navicat 15 for MariaDB Enterprise Edition
You can watch the video tutorial above or view it on YouTube, or just follow the textual instructions with screenshot visuals below:
I will start with a logical data model using Navicat Premium, and as soon as I am finished with it, I will convert it to a MySQL-targeting physical model, and finally I’ll have Navicat create the tables and columns from that physical data model. If you have a different relational database which is supported by Navicat, you can still adapt what you will learn in this tutorial, to your database.
Creating a New Model in Navicat
Once you have the main window of Navicat, first open a connection to your database server, then click the Model icon in the main toolbar. Next, go under the Objects tab, and right-click an empty area, and then select “New Model…” from the drop-down menu.
As of Navicat 15, the user is presented with 3 options to choose from for the model type:
- Physical model which is how it’s already been since the last few versions of Navicat. This is the model type targeting s specific relational DB platform. However, as of version 15, you can now convert a physical model to a logical model or a conceptual model.
- Logical models are general-purpose and what I call database-agnostic. Design them once, as generic models, then you can convert them to a physical model targeting a particular platform. I find this especially useful in projects where we have to work on multi-platform implementations of a given database-driven application. Or due to new business strategy, to fulfill a need to port the database from one platform to another.
- Conceptual models represent a higher level of entity relationships, but they cannot contain column/field details.

A simple conceptual model in Navicat
For the sake of simplicity and brevity, I will demonstrate designing only two entities in this tutorial, namely Country and City, and as you can easily guess, a country has a one-to-many relationship with city.
Designing the Country Entity in a Logical Model
After proceeding with the logical type, we need to start designing the entities that represent the database tables.
When you want to create an entity in Navicat modeler, you can do so by either clicking the tiny table icon in the toolbar of the logical model window, or by right-clicking an empty space within the model design canvas, and then selecting New > Entity from the conceptual dropdown menu.
I am giving this first one the name “Country”, and next thing I will do is to define its attributes (that will end up becoming the database table columns). To do so, I can either right click inside the white area of the box representing this entity, or double click any part of the box to bring up Navicat’s traditional column and property designer form window.
Let me go the first way: right-click and then “Add Attribute”. This way I can simply type the attribute name I want directly in the box.

The first attribute I enter this way is iso_code for the country.

When I hit the Enter key, Navicat infers this attribute as a CHAR VARYING. If this model were rather a physical model, Navicat would most likely infer it as char or varchar. (We’ll also see, a bit later on, this becomes the case when converting the finished logical model to a physical model).

To add the rest of the attributes, I right-click an empty area within the entity and choose “Design Entity”. (Double-clicking anywhere on the entity itself has the exact same effect, for your information.) This will bring up Navicat’s typical table editor where you can specify all the columns (in this case, attributes), the data type, and length, also respective checkboxes to indicate whether the fields are nullable or not, and last but not least, the primary key(s).

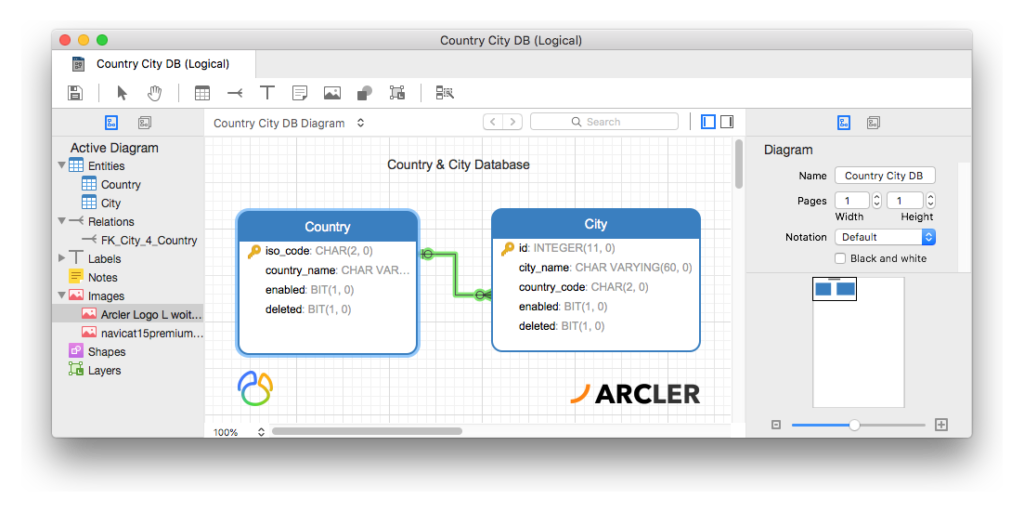
Here I have changed the type of iso_code from “CHAR VARYING” to just “CHAR” and fixed its length to 2, which means two characters. Also defined it as the primary key. I added country_name of length 60 as “CHAR VARYING” as I expect it to become a varchar(60) for my MySQL database, and I completed the design by adding two boolean attributes named “enabled” and “deleted” as BIT(1) and default values set to 0. All I need to do now is to click OK, to finish up my design of the country entity.
So now, we get a sensible visual representation of the Country entity, and this is also a good time to save our changes, so I will go ahead and save this model.

Designing the City Entity in a Logical Model

As my spoiler in the conceptual model has already been revealed by now, the second and the last entity for this model is City. The steps to create it are somewhat similar to what we have already done for the Country table.

Notice the country_code attribute which is of type CHAR(2), because this will ultimately be a key column for the foreign key to country’s iso_code. To make this definition, while this pop-up designer window is still open, click “Relations”, next, above the relations tab view, click the tiny button indicating to add a link in the chain (or at least that’s what its little icon represents).

When defining a foreign key in Navicat, you need to specify referenced table, referenced attributes and referencing local attributes by clicking right under the corresponding column in the table view.

Our model is almost already except I think it could use some fine-tuning in the join type. Right-clicking the line connecting the two entities will allow us to specify the cardinality on each of the respective entities:

A country can have zero or many cities, and a city can have zero or one country. After finishing up with the relationship definitions, our model will look like the one in the screenshot below:

Converting the Model to a Physical Model

Now that our logical model is complete, it is now also ready for conversion. As previously stated, a logical model is a generic data model which can be used in any database Navicat is compatible with, and in this case I want to create a MySQL database out of this.

So I’m setting the model type to Pysical and selecting MySQL as the target database.

The initial conversion from a logical model to a physical model in early versions of Navicat 15 has a couple of drawbacks in which some of the entity attributes do not quite have the right data type. (I have been using Navicat Premium 15.0.10 for Mac at the time of this writing). For example I had defined the ID attribute of the city entity as INTEGER(11), the enabled and the deleted attributes as BIT(1) respectively in both entities. They have been imported here as int(-1) and tinyint(-1) respectively.

They are very easy to fix, though. Just double-click each of the tables, and with Navicat’s field editor, you can adjust the correct column type and data length. In this case I will set the id column to int(11) and remember to give it the “auto-increment” attribute, and then make both enabled and deleted bit(1) default 0, meanwhile deleting all the ‘-1’s in the decimal columns.


Lastly the foreign keys need some fixing, too, as they have not been interpreted correctly. (People at Premiumsoft Cybertech, the makers of Navicat, would definitely fix this bug in an upcoming minor version, so you might possibly not even have to deal with this in a newer version.)

With the foreign key definition I named “FK_City_4_Country”, city.country_code is supposed to be referencing country.iso_code – this is what we defined in the logical model, but the physical model seems to have mixed up this info during conversion – something we can fix here on this screen.

First I’ll make sure country_code is the only field under “Fields”. This is the referencing field of the city table.

Next, I will redefine referenced field as country.iso_code by clicking the “hoverable” small button under “Referenced Fields” and then selecting the correct field from the pop-up list box, and clicking “OK”.

Lastly I will select “RESTRICT” for the “On Delete” case, and “CASCADE” for “On Update”. This way, a country that has a defined city with its ISO code cannot be deleted without first deleting the city. But in cases where the iso_code is updated for a given country, all of its cities’ country code (which is the same as the iso_code) will automatically get updated in the database. I click OK to close this editor.

Finally our physical model diagram is complete, and now I’ll save it as “Country City MySQL DB (Physical)” to be able to easily distinguish it on my models list in Navicat.
Creating the Database (Schema)
Now we have almost everything ready to create the database tables from the physical data model we have just created. In order for Navicat to generate the table structure from the model, it needs an existing database schema to work on. This can either be a blank database, or even one with existing tables on it. (In the latter case, Navicat does its best to synchronize the changes between existing tables and columns in the database with ones defined in the data model.
In this case, I will simply create a blank MySQL database called “countrycitydb” to produce the tables and columns for the first time right from the physical data model.

Creating Tables and Columns by Synchronizing the Data Model with the New Database

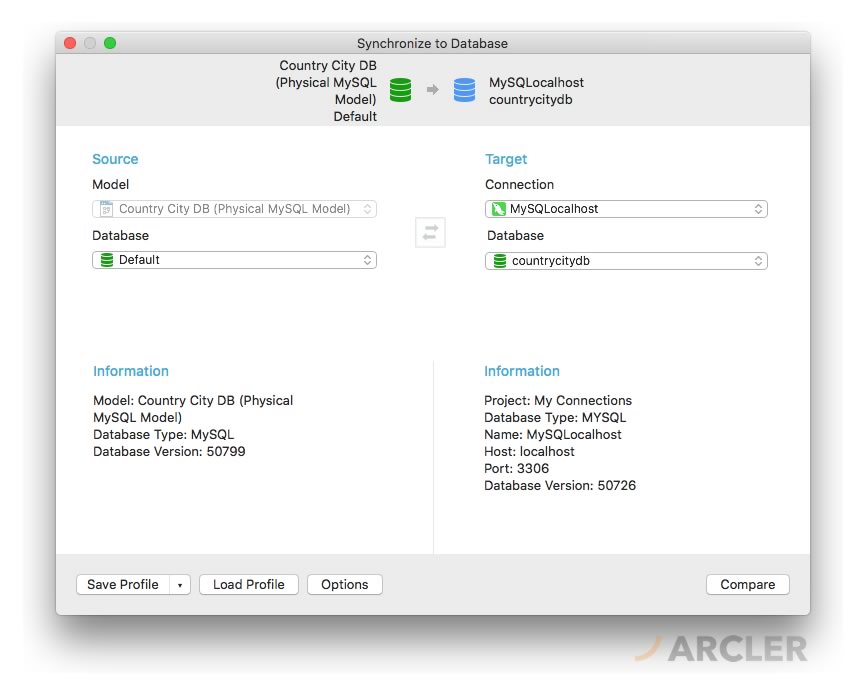
Now we can go back to our physical data model, then pull down the File menu, and then select “Synchronize to Database…”. That will open up Navicat’s database synchronization dialog window where you specify the source and target.

If you are followingalong this tutorial hands on, be sure to select “Default” from the pop-up menu in the “Source” column. As for the target, the connection and the database need to be also specified using their respective drop-down menus. Then click the “Compare” button at the bottom-right of this window.

On the next screen, you can verify which objects will be created. If you uncheck any of the items in the “source” column, they will be omitted in the operation. Clicking “Deploy” on the bottom-right corner, will take us to the next screen where a preview of all SQL commands that will be executed, will be listed.

This is perhaps the coolest feature of Navicat. At this point we can either finish the job by clicking “Execute” on the bottom-right, or copy the entire SQL code to use it elsewhere or Navicat’s query builder screens. That way, the user has all the flexibility if they have second-thoughts on the structure design and they would like to change it by modifying the SQL code.
As I can verify the code on this screen is exactly what I want, so I’ll finish simply by clicking “Execute” to run this code.

On this final screen, we can see the result of executed SQL commands as database queries. There is always the option of “Recompare” which would re-analyze the differences between the source (in our case, the data model) and the target – if any – and then present another chance to sync them up. However right now, the message log inside the window indicates that all commands have been successfully executed and there have been no errors, which means the database tables and columns have been created alright.

For what it’s worth, you can quickly populate these two tables with some sample data using the SQL dumps which you can download using the links below, and then execute in Navicat.

If you are new to Navicat, it is as simple as right-clicking the database under the connection, and select “Execute SQL file…” from the pop-up menu.


When we refresh the window (or just re-run the SELECT query), we’ll see the sample data adequately put in the city table.


What do you think?